
FAQ: How does SnapEDA create slotted holes in KiCad?
Update: SnapEDA now supports native slotted holes in KiCad!
Important Note: Instructions below are outdated, unless you’re using an older version of KiCad (pre-V4) or in cases of irregular slots for square/round pads, where the hole measures greater than the pad shape.
—————————————————————————————————————–
Q: How does SnapEDA define slotted holes in KiCad?
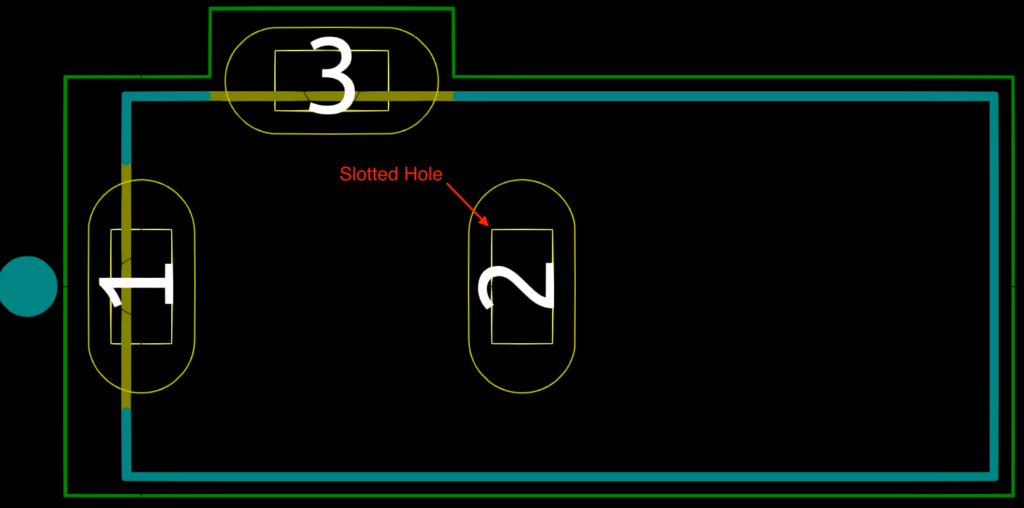
A: Our current KiCad .mod format doesn’t support slotted holes. However, SnapEDA is able to support them with some workarounds. We create them by first placing a normal oblong through-hole pad, with a diameter that fits the slot we need, and then designing the slotted openings by drawing the slot outlines on the Edge.Cuts layer (See Figure1). The cutouts on this layer override the round through-hole pads, thus creating slotted holes.
To see the slotted holes, select View > Drawing Mode > Sketch Pads.
Q: How can I ensure my PCB manufacturer will properly interpret the slotted holes?
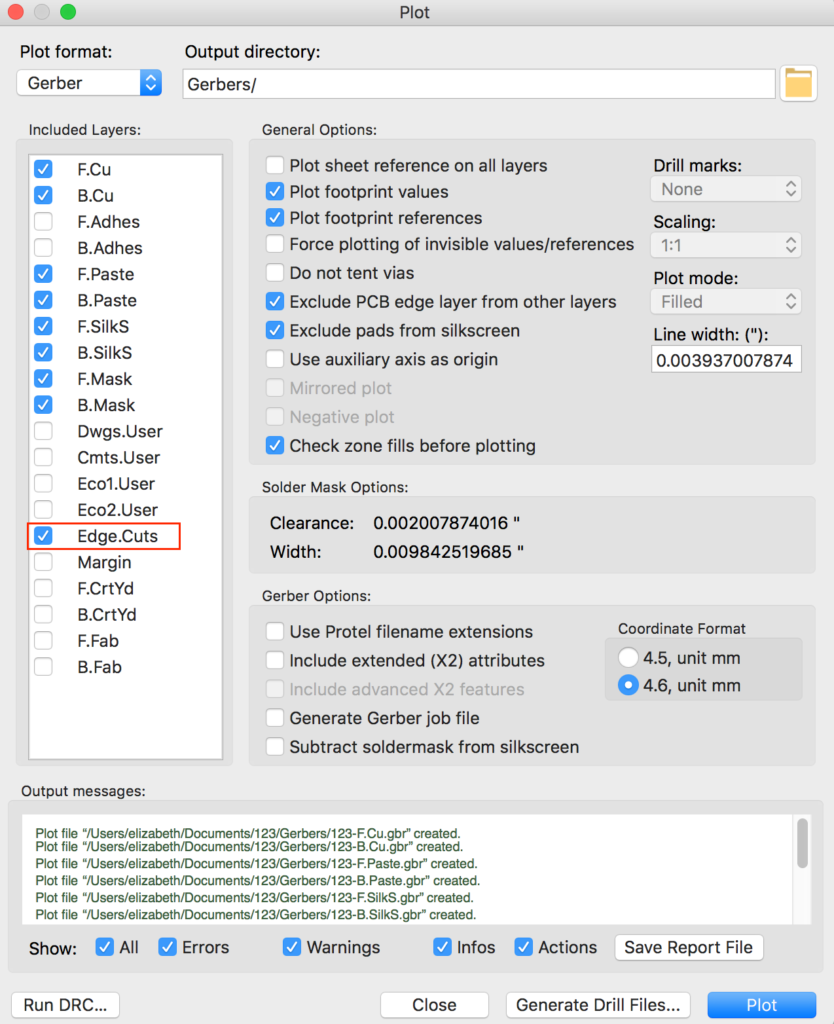
A: First, ensure that you are exporting the Edge.Cuts layer with your gerber files, as shown in Figure 3. Then, for extra clarity, please remind your board house to mill the holes found on the Edge.Cuts layer.