
Getting started with SnapEDA Part II: Using InstaBuild
In the second part our Getting Started guide, we’ll be showing you to how to use SnapEDA to speed up symbol & footprint creation when the exact part you need doesn’t yet exist in our library.
As we covered in Part I, SnapEDA provides a massive search engine of free schematic symbols, PCB footprints & 3D models to help you design electronics faster. But what happens when a part isn’t yet available in our library? In addition to requesting symbols & footprints with InstaPart, you can also build them in minutes using our free automation tools.
Using simple computer vision, we’ll help you extract symbol pin and pinout information from datasheets in seconds. Using artificial intelligence, we’ll automatically arrange the pins based on pin type and our symbol standards.
Let’s take a look at how to use this features to accelerate your next design!
InstaBuild
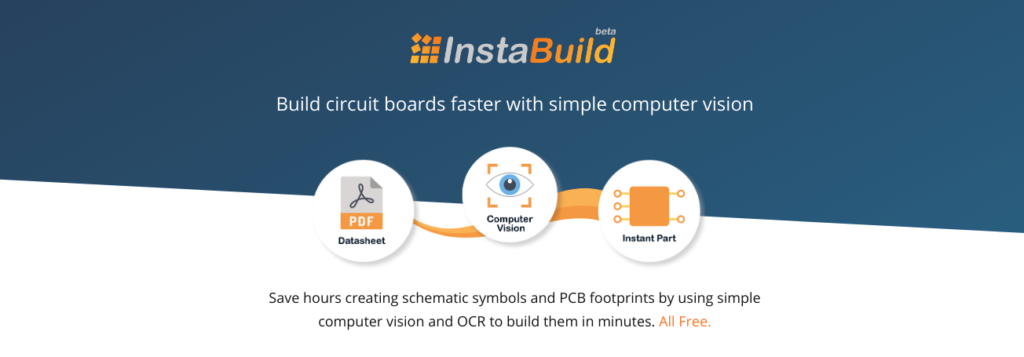
InstaBuild uses computer vision and Optical Character Recognition (OCR) to build integrated circuit (IC) symbols in minutes. InstaBuild recognizes the pin numbers and names from the pin definition table in a datasheet, and extracts them to auto-generate your symbol.
InstaBuild automatically detects the type of each pin – whether it’s a power, input, output, bi-directional, ground, clock, or other type of pin – and then places those pins in the appropriate places in your schematic symbol. Remember to check our standards for guidance about pin placement!
Our InstaBuild suite of tools also includes IPC footprint calculators to help you build packages too. We’ll cover that in our next guide.
Using InstaBuild to generate symbols
1) Navigate to the part you want to create
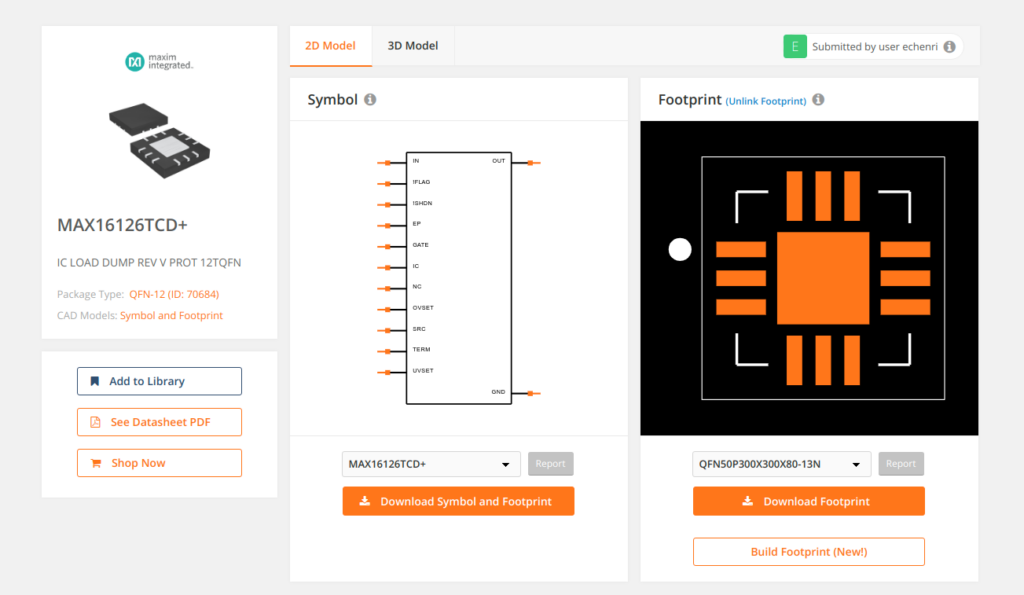
The first step is to find the part you want to automate on SnapEDA. For this example, we are going to use the MAX16126TCD+ from Maxim Integrated as an example. You’ll notice that this part has a verified footprint available, but does not have a symbol. This makes it a prime candidate for InstaBuild! Click on the Build option to begin.
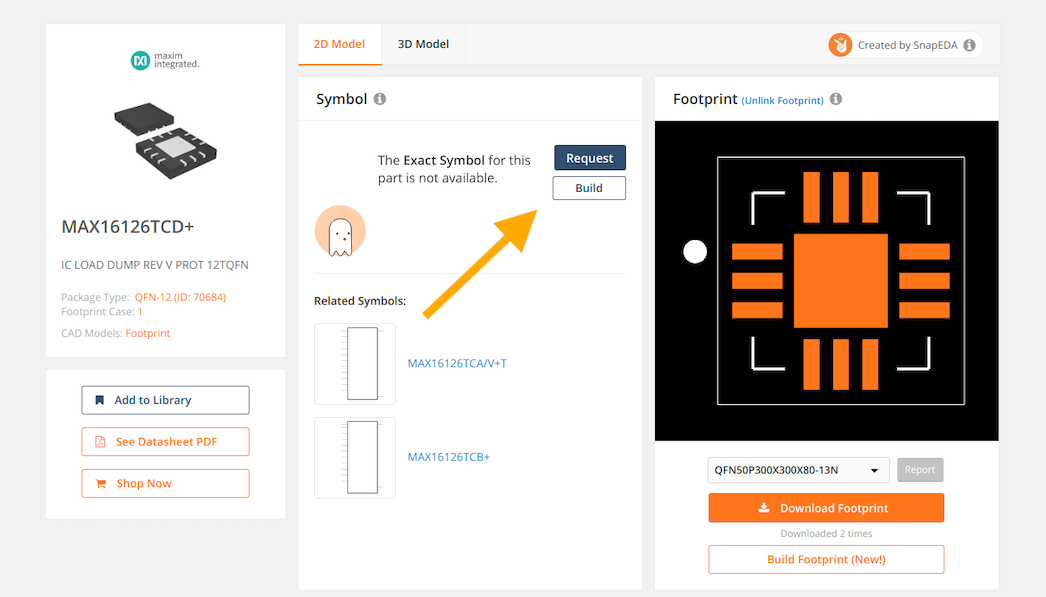
2) Start building
Once you click Build, the tool will automatically pull in the datasheet if it’s available. If it’s not, you may need to upload it.
The tool will also automatically navigate you to the pinout page, however, if it doesn’t just scroll down to find it. From there, drag over the pins and click on Extract Pin Map From Table to extract the pin data, including the symbol pin names and the pin numbers.
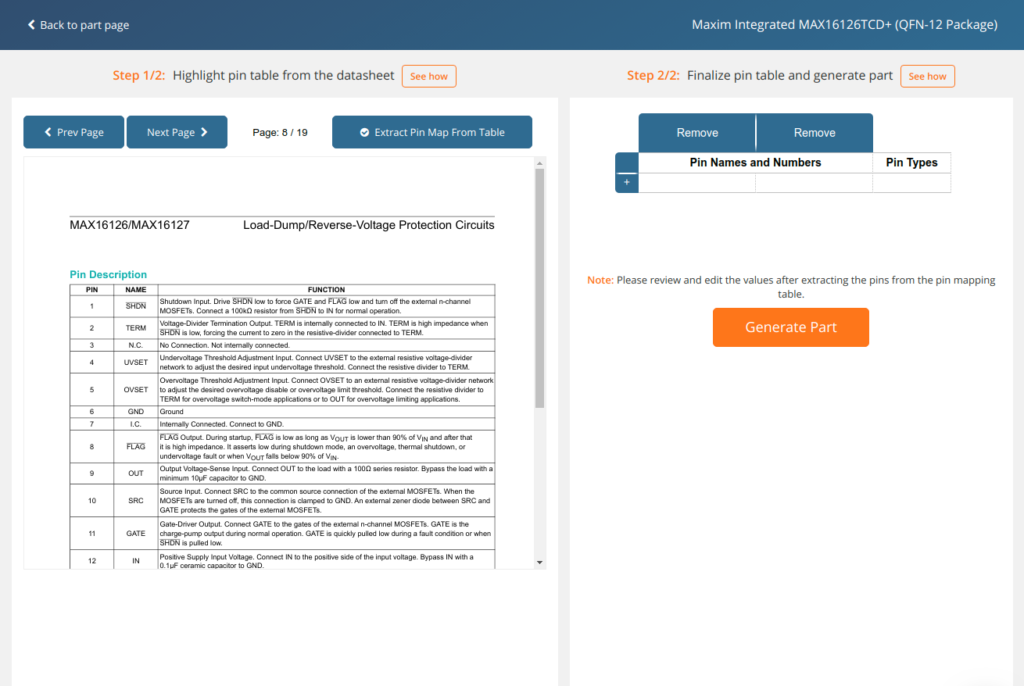
3) Check & Generate!
The next step is to check the data. Do a quick scan to make sure the symbol names and pins were imported properly. Also, make sure that you have removed the empty rows. Mark any active low pins with a “!” symbol. If there are any exposed pads, make sure to assign a pin number to it, so that the part can be created successfully. All symbol pins need to be connected to a footprint pin in order to properly generate the part.
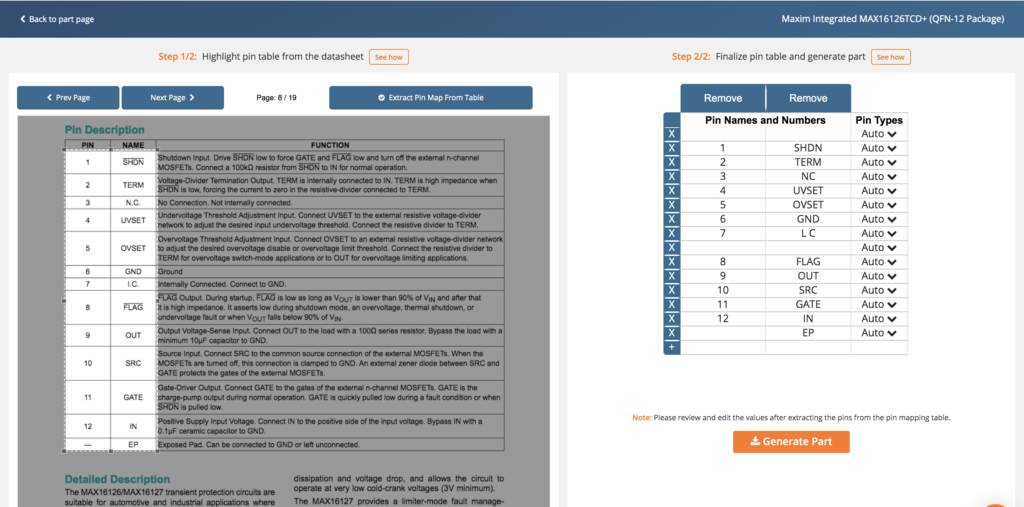
After verifying the data in the extracted table, click Generate Part to create the schematic symbol. You can now download the part for your desired CAD format!
See It in Action
Considerations
• The “InstaBuild” tool shows up on part pages that we have determined can be built using InstaBuild.
• Parts with pin descriptions not in a table format cannot use the computer vision feature of InstaBuild. In cases like these, manually input the required data.
What’s Next
In this tutorial we explored how to use InstaBuild to auto-generate schematic symbols in minutes using computer vision. In the next version of our Getting Started guide we’ll explore how to use InstaBuild to generate PCB footprints. Until then, happy designing!