
Getting started with SnapEDA Part I: Introduction
We started SnapEDA with a simple mission: to help engineers innovate faster by removing barriers. We believe in a world where engineers have the building blocks they need at their fingertips so they can spend their time designing – and making the greatest impact with their work.
Starting out, one of the biggest pain points that we (as engineers) identified in the design process, was making the digital models for each component on a circuit board. We realized that engineers all over the world were spending hours making the same models – such as symbols & footprints – over and over again, a tedious and error-prone activity that took engineers away from their core focus – designing great things.
This is why we created SnapEDA, the first & biggest free search engine for electronic component models. Whether you’re looking for symbols, footprints or 3D models, you can download them all at the snap of a finger. SnapEDA supports nearly every PCB design tool in the market (Cadence Allegro & OrCAD, Altium, KiCad, Eagle, PCB123, Proteus, and more!).
In this blog series, we’ll show you how to get started with SnapEDA to start boosting your design productivity. We’ll begin by looking at some of the key features of SnapEDA, and then dive into some of the more advanced ones in later posts.
1. Start by searching on SnapEDA
Your journey on SnapEDA will typically start with a search. Think of it Google, but just for electronic components. You can:
• Enter a specific part number (ex: ESP8266), or
• Enter the specs of a part you need (ex: header 60 pin 1.27mm pitch)
From there, we’ll show you the parts that are available. We show parts that have models at the top of the results, and then show the parts without models below that (so that you can request them – more on that later!).
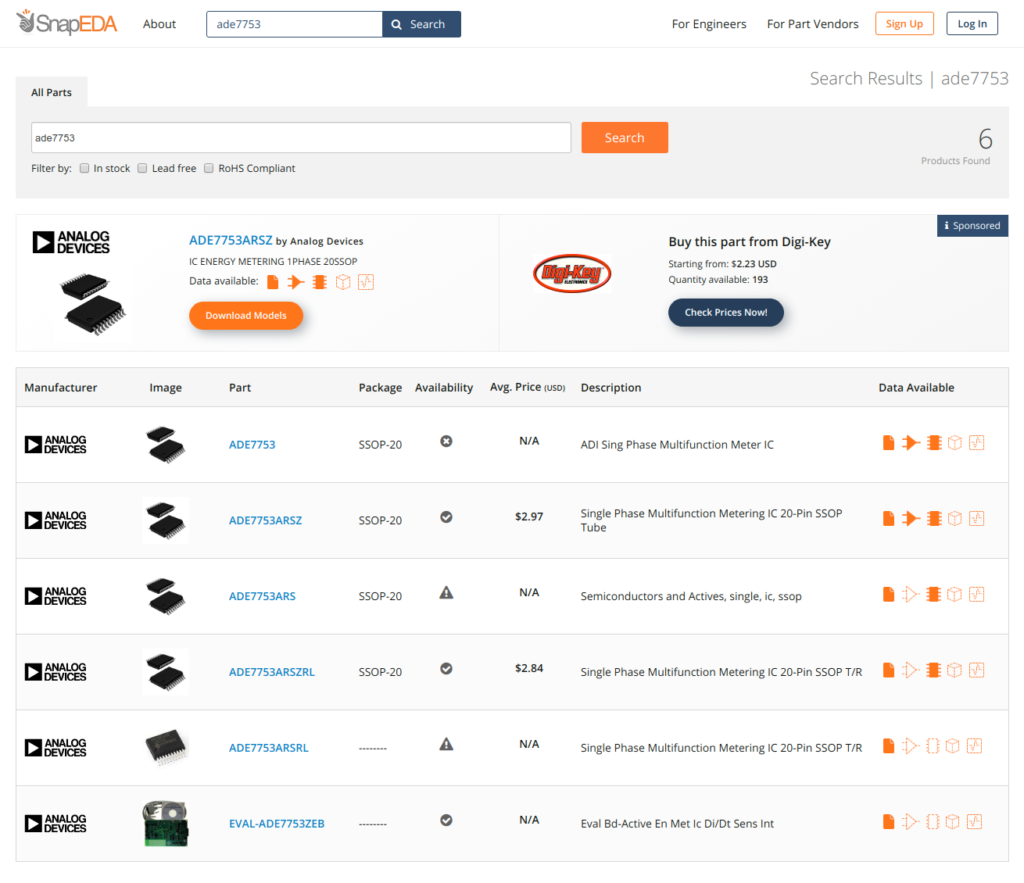
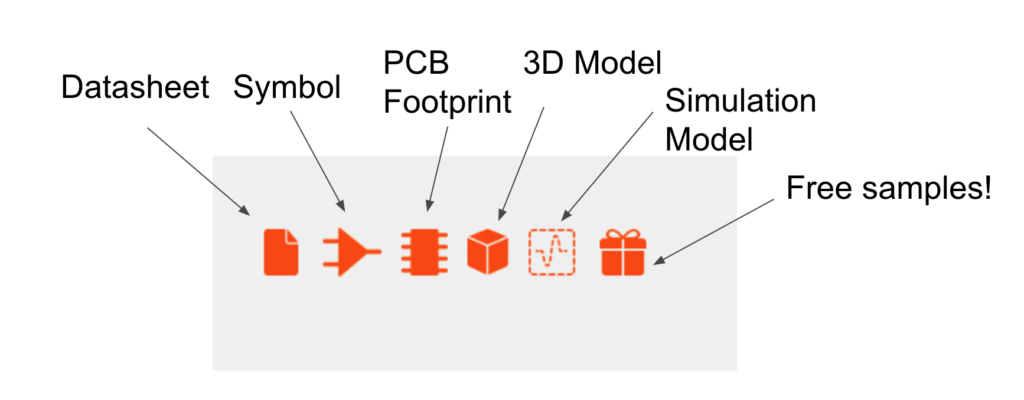
On the right-hand side of the search, you’ll see the data available for you to download (all free) – such as schematic symbols, PCB footprints, 3D models, SPICE & IBIS models, and datasheets. We’ll even show you electronic component manufacturers that offer free samples through SnapEDA!
Orange-filled icons show that the data is available, while transparent icons indicate that there is no data available for that part.
Pro tip: Some brands that offer free samples through SnapEDA include Samtec, RECOM, and CUI.
2. Explore the SnapEDA part pages
The part pages on SnapEDA are where the magic happens! ????
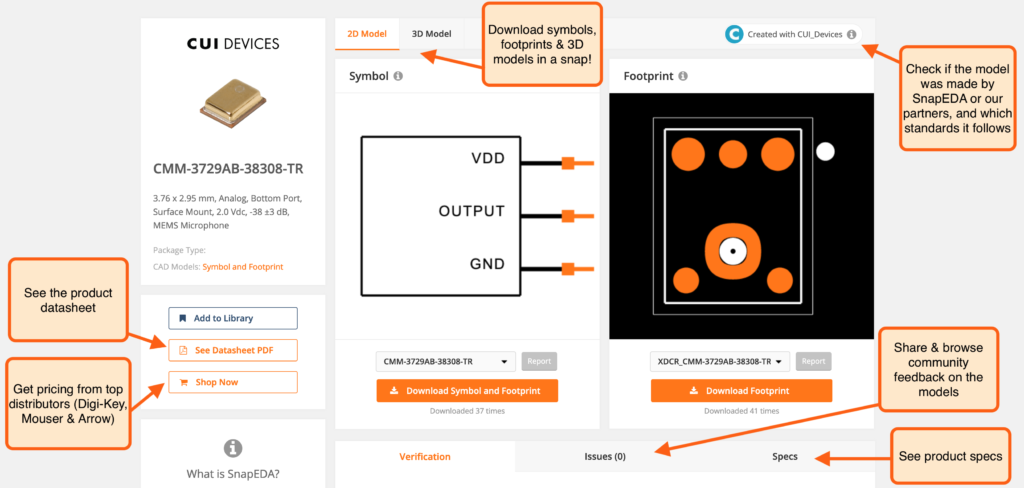
Once you’ve found an electronic component in the search that matches your needs, simply click on it to navigate to the part pages. There, you’ll see a dashboard-view with everything you need to know (or download) about the component. In addition to the digital models (symbols, footprints, and 3D models), you’ll also find datasheets, pricing & availability (from Digi-Key, Mouser, and Arrow), specs, and more.
As electrical engineers, one of our biggest frustrations when using third-party libraries was that we didn’t know if we could trust the models.
To help solve this, we’ve made two key features to give engineers transparency into the quality of the data on SnapEDA.
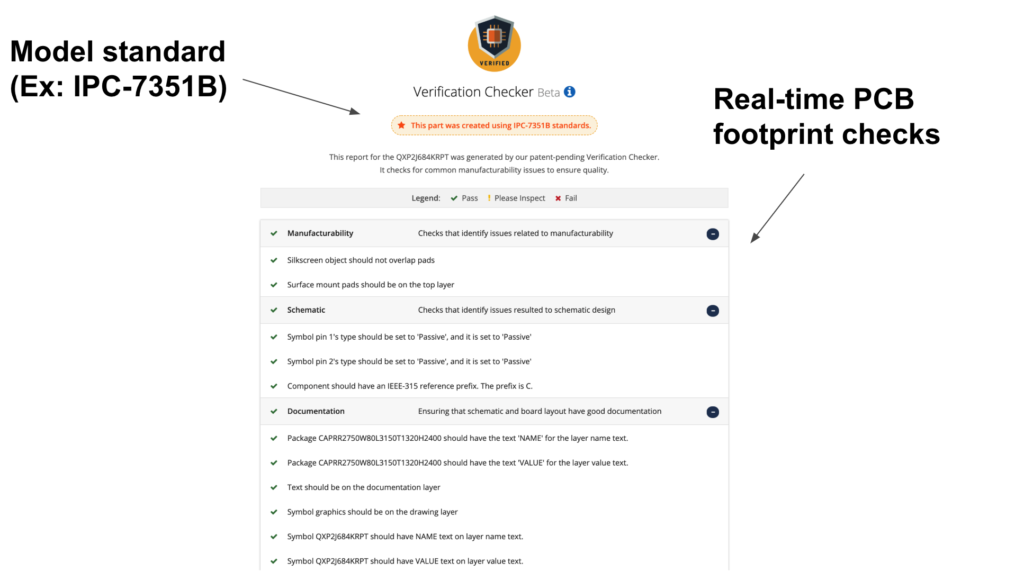
#1 – We created powerful verification technology
On every single symbol & footprint, you’ll see real-time checks that give you transparency into the quality and manufacturability of the model. At the top, you’ll see which standard we followed for the footprint (ex: IPC-7351B or the datasheet recommended land pattern). Meanwhile, below that, you’ll see a series of checks for both the schematic symbol and the PCB footprint.
We’ll demonstrate things like that there are no silkscreen overlapping pads, that the power pins are marked as power pins for proper ERC checks, that the centroid is at the center of mass for symmetrical components, or Pin 1 for non-symmetrical components.
You can learn more about the standards we use for footprints and symbols.
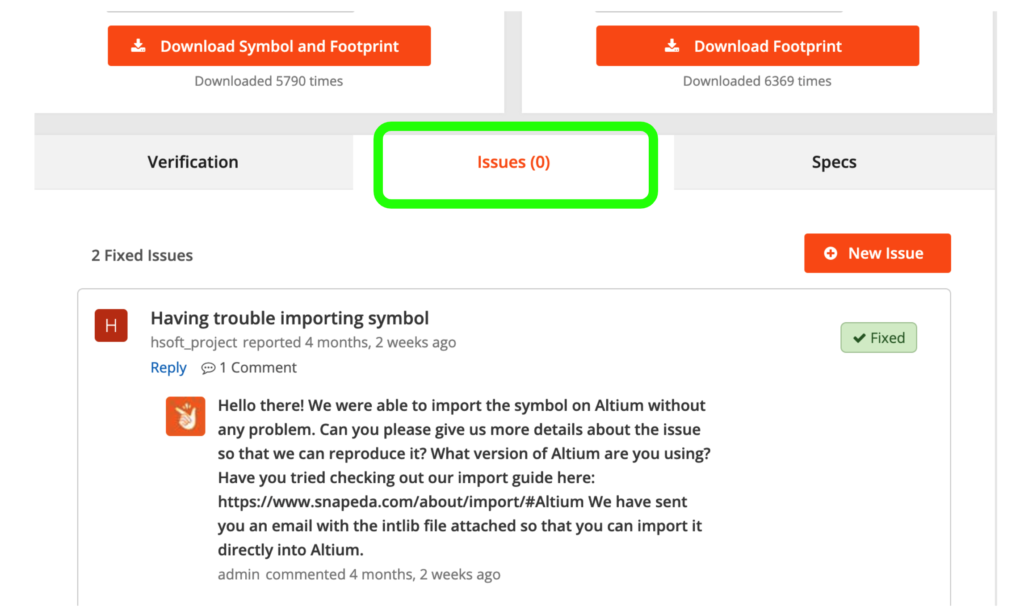
#2 – We show engineers community feedback on each model
On the Issues tab, engineers can see whether any other engineers have reported any issues. They can also submit an issue report, responded to by our engineers within 24 hours!
3. Download in a snap!
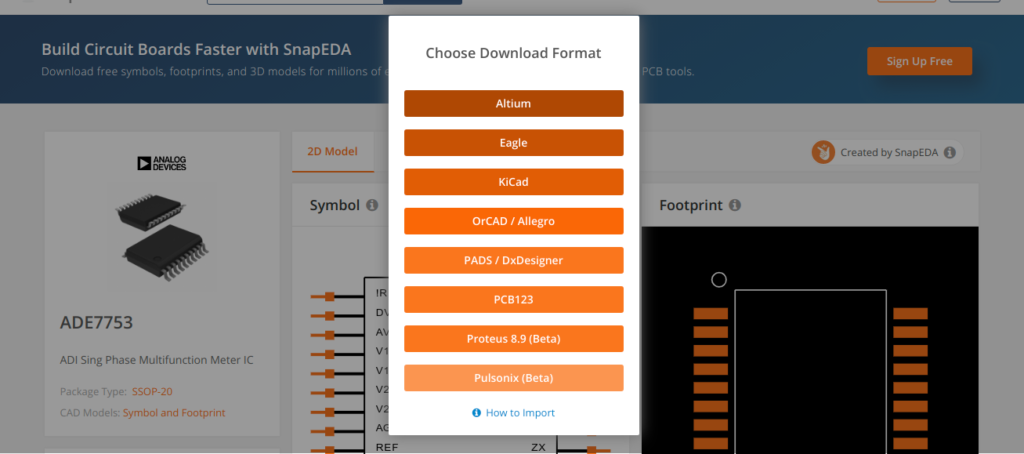
Once you’ve found a symbol, footprint or 3D model that you need, downloading is a snap! With a single click, download the part for your preferred CAD software.
Our proprietary technology exports to every major PCB design tool in the market (Allegro, OrCAD, Altium, KiCad, Eagle, Proteus, PCB123, & more.)

Simply click Download, and then choose your preferred format. You can learn how to import into your PCB design tool in our Import Guide.
4. What happens if the model doesn’t exist on SnapEDA yet?
Since there are hundreds of millions of electronic components in the marketplace, it is inevitable that some parts may not yet be on SnapEDA. There are two options to get a model when it doesn’t exist on SnapEDA:
#1 – You can request it with InstaPart
InstaPart is our 24-hour request service. We’ll make the models in 24h hours for you, while you stay focused on your design. Once we make the model, you’ll get a notification that it’s available. You’ll also feel awesome knowing that it will be available for the entire community to download for free! ????
#2 – You can make it with InstaBuild
InstaBuild is SnapEDA’s free computer-vision based symbol builder. Using computer vision and AI, it makes symbol building easy and fun by automating your PDFs!
And that’s it for Part I
This was just a quick introduction to the most basic features of SnapEDA. We’re excited to have you as a part of the SnapEDA community. There’s so much more we want to share with you.
Let’s move on to Part II – Using InstaBuild – where we will delve into creating symbols and footprints for parts using our free automated part builder.